 I was having a Twitter conversation with a friend about Twitter best practices, and he mentioned that he’d love to be able to keep his corporate friends separate from his personal friends. I figured there were probably others who wished for the same thing, so I thought I’d do a quick blog post on how you can categorize your friends in Facebook, creating filters for what each list of friends can and can’t see. This is particularly useful if you’re concerned about letting business associates see more personal posts. The same friend can be on multiple lists.
Creating a Facebook Friends List
- Mouse over the “Friends” link at the very top of the page, and click on “All Friends”
- Click “Create New List” at the top of your “All Friends” list (a popup box appears)
- Enter a name for the list, such as “Business Friends” or “Coworkers”
- Select all the friends you want to be on that list (you can do this by typing in names or click on the pictures in the popup box, selecting as many friends as you want)
- Click “Save” once you’ve added everyone you want to include in the list (the list will appear in the left channel on your Friends page, with the name you gave it)
- Click the “X” to the right of a friend’s entry to remove them from a list
- Click “Delete List” to delete a list
Using Facebook Friends Lists
- Send a message to everyone on that list at one time by typing the name of the list in the “To” field of your Facebook message (under Inbox)
- Invite an entire list to join a group, become a fan of a page, or attend an event from within those applications
- Filter the updates that appear on your home page from friends (a good resource for how to do this is on Tech for Luddites at http://www.techforluddites.com/2009/03/using-the-new-facebook-home-page-pt-2.html)
- Exclude certain friend lists from seeing specific (or all) updates:
- Mouse over “Settings” and click on “Privacy Settings”
- Choose “Profile” (or one of the other items listed)
- Select an information type, such as “Wall Posts”
- Click the down arrow and then select “Customize” from the list
- Under “Except These People” type in the name of the list you want to exclude OR under “Friends” click “Some Friends” and type in the name of the list you want to include
- Click “Okay”
- Click “Save Changes”
Facebook Screen Captures for Creating Friends Lists
For all the visual learners out there, below are a few screen shots to correspond with creating Friend Lists, and then modifying them.
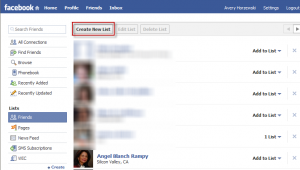
Click “Create List”
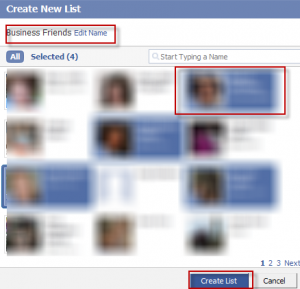
Enter list name, add friends, and click “Create List”
Facebook Screen Captures for Modifying Friends Lists
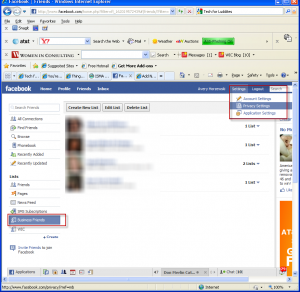
Click list name in left channel, mouse over “Settings” in the upper right, and click “Privacy Settings”
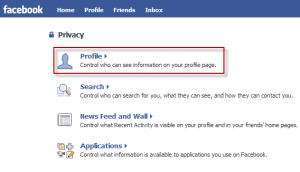
Click “Profile” or one of the other settings in the list
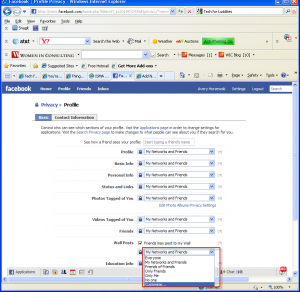
Select “Wall Posts” or one of the other items, click the down arrow, and click “Customize”
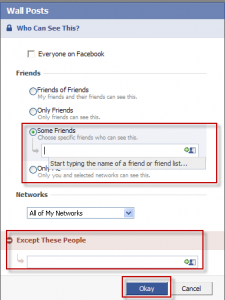
Under “Friends,” click “Some Friends” and type the name of the list you want to include OR under “Except These People,” type the name of the list you want to exclude

